1. Explanation
1.1. Single Pinhole Cameras
As explained in the perspective camera (the default camera) simulates a pinhole camera, which is a camera that only allows photons that travel through a very small photon-sized hole to reach the screen. This produces a perfectly crisp image.

In an ideal world, our eyes would be pinhole cameras, i.e. our pupils would be one photon wide. However, our photon detectors at the back of our eyes (the retina) are far from perfect: they need a minimal amount of photons to arrive each second so as to be able to form a clear image. A pinhole-sized pupil would not let enough photons in. The only solution is to enlarge the pupil, thereby letting more photons in.
1.2. Dual Pinhole Camera
Let’s say, for the sake of explanation, that evolution, upon remarking that a pinhole pupil will not do, decides to equip us with a second pinhole pupil in the same eye.
|
|


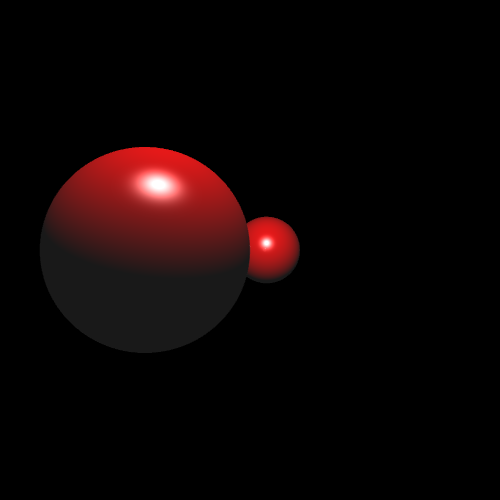
This has as consequence that there are two images being projected onto our retina. These two images are almost identical, except for the fact that both images view the same scene from slightly different angles. Below are two renderings showing the two images that reach the retina. For clarity, the distance between the two pinholes has been greatly exaggerated.
|
|

These two images are blended together:

1.3. Multi Pinhole Camera
Let’s add two more pinholes. Four distinct images get projected onto the retina:
|
|
|
|
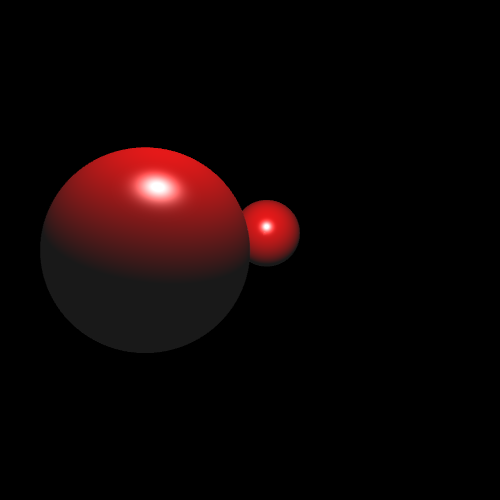
Combining these four images yields

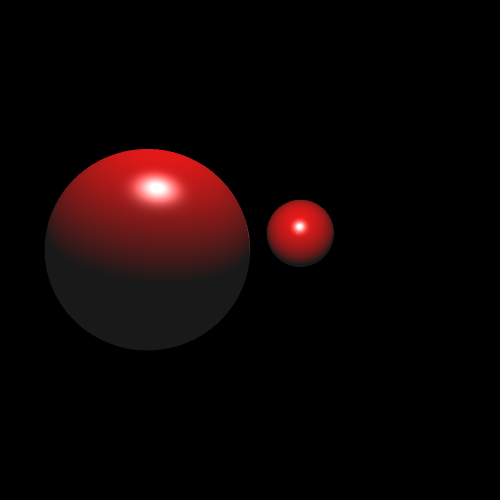
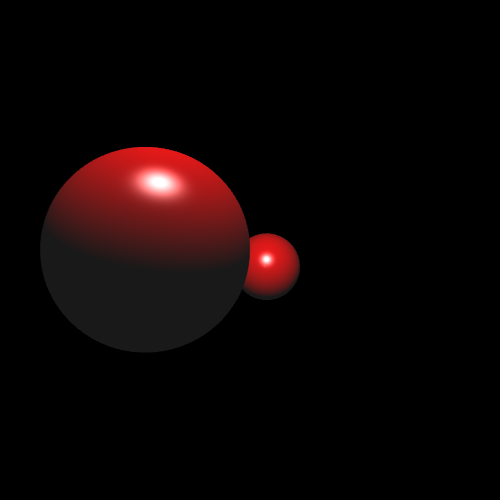
If we add many more small pinholes, ultimately forming the pupil as we know it, we get as result

Remember though that we spread the pinholes over an exaggeratedly large area, making the sphere in the back look a lot more blurred than it should be. If we shrink the pinhole area to a more reasonable size, we get
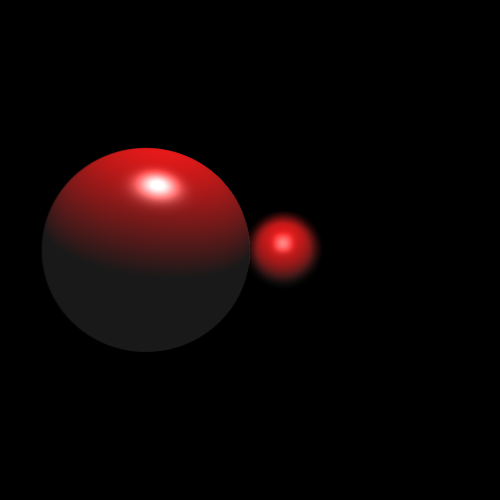
Each pinhole corresponds to a perspective camera. The more pinholes we introduce, the more images are added together, creating a blurred result.
1.4. Focus
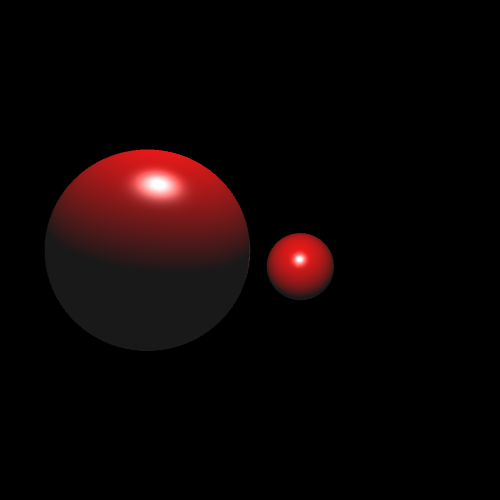
We have overlooked an important detail though: why is the front sphere looking that much less blurry than the one in the back? This has to do with the lens in our eye, which bends light so as to try to "unblurify" the image. However, this is impossible to do without making any concessions: the lens can only make objects at the same distance crisp at the same time. So, you can either focus on the objects closeby (making far away objects blurred), or you can choose to focus on distant objects (thereby making close objects blurred.')
In order to define a depth of field camera, we do not need to simulate this lens
Instead, a simpler method exists. We create a separate perspective camera at each
pinhole position, but we put the look_at on the point we want to focus on:
|
|


In summary, to create a depth of field camera with the eye at \(E\), looking
at position \(P\) (which should be in focus),
you need to create multiple perspective cameras. These cameras share
the same look_at \(P\), but differ slightly in \(E\).
The larger the eye positions differ, the more pronounced the blur becomes
for objects out of focus.
2. Comparisons
2.1. look_at
Below you can compare what happens when you create depth of field cameras
for a different look_at positions:
|
|


2.2. Eye area
Below you can compare what happens when you create depth of field cameras whose multiple pinholes are spread over differently sized areas. The larger the "eye area", the more blurry out of focus shapes become.
|
|

