Difficulty |
5 |
Prerequisites |
|
Important
|
This extension requires a samples that is able to generate multiple sampling positions, i.e., the default single sampler does not suffice. |
def material(c)
{
Materials.uniform( [ "ambient": Colors.white() * 0.1,
"diffuse": c * 0.8,
"reflectivity": 0.0,
"transparency": 0,
"refractive_index": 0 ] )
}
global m = mesh("G:/repos/ucll/3dcg/raytracer/meshes-v3/meshes/optimized-bunny.mesh")
def scene_at(now)
{
var camera = Cameras.perspective( [ "eye": pos(0,0,3),
"look_at": pos(0,0,0) ] )
var angle = Animations.animate(degrees(0), degrees(360), seconds(5))
var bunny = rotate_around_y( angle[now], decorate( material(Colors.white()), center( pos(0, 0, 0), m ) ) )
var root = union([
group(0, bunny),
translate(vec(0,0,-5), decorate(material(Colors.white()), xy_plane()))
])
var lights = [ Lights.omnidirectional( pos(5, 5, 5), Colors.white() ) ]
create_scene(camera, root, lights)
}
var raytracer = Raytracers.latest()
var renderer = Renderers.edge( [ "width": 500,
"height": 500,
"sampler": Samplers.multijittered(2),
"ray_tracer": raytracer,
"stroke_thickness": 0.0075,
"stroke_color": Colors.black(),
"background_color": Colors.white() ] )
pipeline( scene_animation(scene_at, seconds(5)),
[ Pipeline.animation(30),
Pipeline.renderer(renderer),
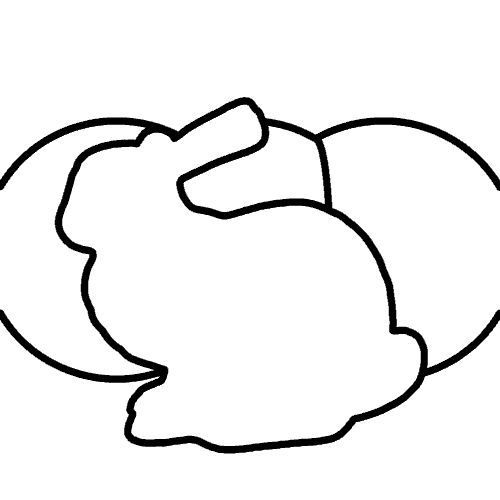
Pipeline.studio() ] )Would you look at that magnificent outline! For those not at all impressed, this extension should be made together with the Cartoon Renderer so that it can be combined by Masking Renderer. There’s no way you’re not excited to start working on this extension now.
1. Getting Started
This extension needs to be implemented as a renderer. So, an excellent first step would be to copy an existing renderer and modify it.
|
Create new files |
2. Parameters
The StandardRenderer takes a number of parameters: horizontal_size, vertical_size, etc.
Our new EdgeRenderer takes the same parameters, plus some others:
-
double stroke_thickness -
Color stroke_color -
Color background_color
|
Update the code so as to accomodate these three parameters:
|
3. Making it Work
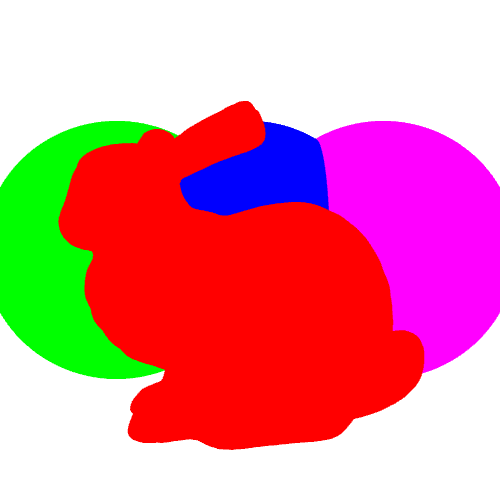
First, make sure you know about groups. Here’s a simple scene with a bunny and three spheres, each in their own group, making 4 groups in total.

3.1. Groups
The standard renderer shoots a ray through each pixel of the bitmap (we ignore samplers for now) and asks the ray tracer to follow this ray around the scene.
The result of this tracing operation is returned as a TraceResult object.
This object contains the color the pixel is supposed to have.
It shouldn’t come as a surprise that the standard renderer uses this as the color of the pixel it is trying to render.
The TraceResult object also contains a group_id field: this represents the group to which whatever primitive was hit belongs.
Instead of a grid of colors, we could create a grid of group_ids instead.
If we assign a separate color to each group, we would get
3.2. Edges
The goal is to get
The basic idea is simple: pixels can be either black or white. Only pixels on an "edge" are black. This raises the question: what is an edge?
Fortunately, this is easy to answer: consider two adjacent pixels and look at which group they belong to. If the groups are different, we can say they’re both on an edge. To get thicker edges, we simply need to look further than just the adjacent pixels.
3.3. Samplers
Samplers complicate things a bit: these cause you to have to shoot multiple rays through pixels, each potentially hitting a different group. You will have to decide what it now means to be on an edge.
Also, rather than a pixel being either on an edge (black) or not on an edge (white), you get to deal with percentages now: it is possible that a pixel is half on an edge, half off an edge, causing you to have to assign a level of gray to the pixel.
3.4. Implementation
In order to implement it, you’ll have to experiment a bit until you get acceptable results.
-
Create a grid the same size as the intended result bitmap.
-
For each pixel, collect the
group_idand sample position for each sample. Store these in the grid. -
In a second phase, compare pixels with their neighbors. Don’t restrict yourself to the immediate neighbors: depending on the
stroke_thickness, you might need to compare pixels farther away from each other. -
Use some logic to determine what fraction of the pixel is on an edge and assign a color based on that.
|
Make the
|
4. Evaluation
|
Explain your implementation in detail. How do you determine the "edge percentage"? |
|
Render the scene below: 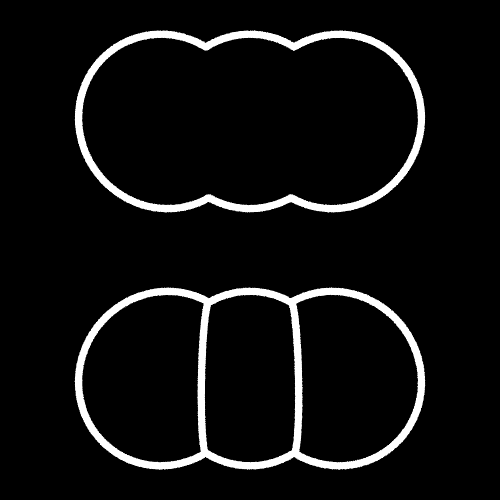
|